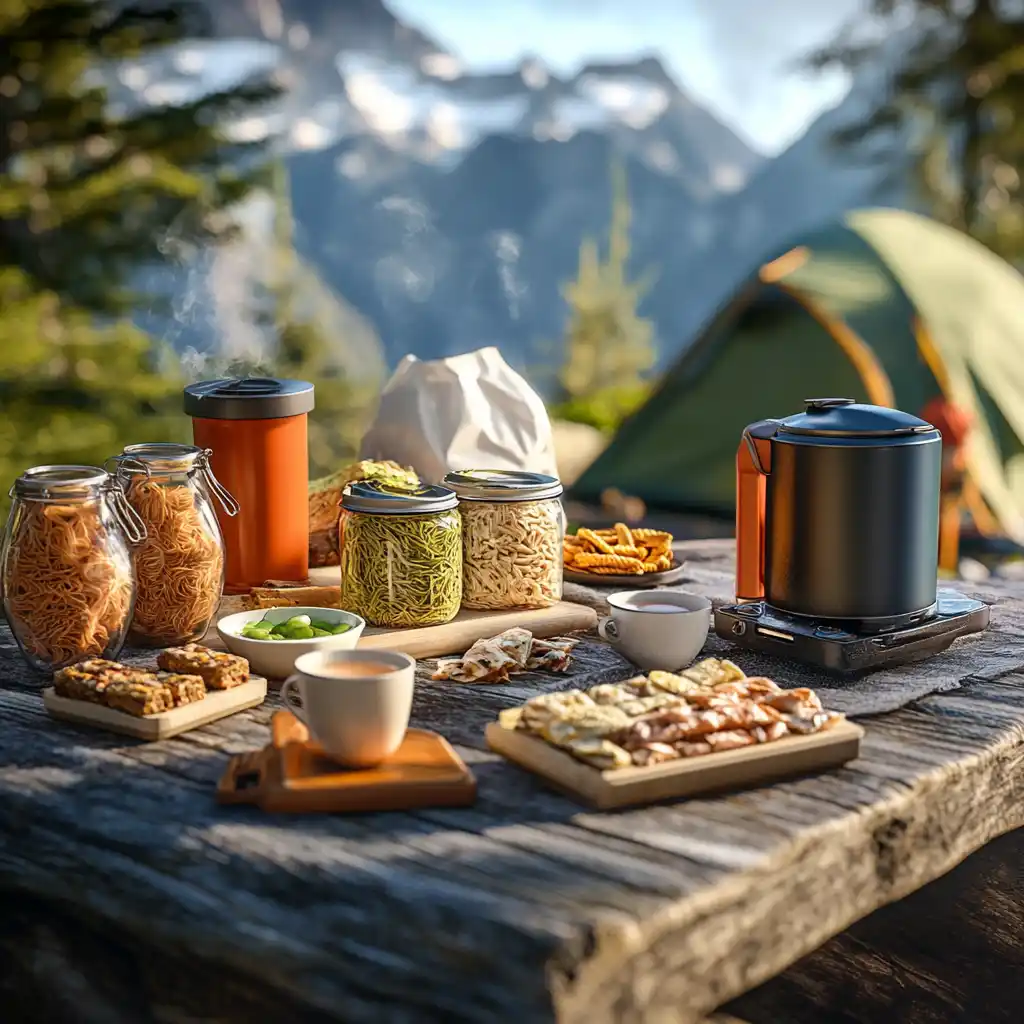
When hitting the trail, every ounce in your pack matters—including your food. Proper meal planning is essential for backpackers to ensure they stay energized, maintain endurance, and enjoy their time outdoors without carrying unnecessary weight.
Backpacking meals need to meet three key criteria:
- Lightweight – Every extra pound in your pack adds strain to your body, so food should be compact and non-perishable.
- High-energy – Long hikes burn significant calories, meaning meals should be packed with protein, healthy fats, and complex carbohydrates.
- Easy to prepare – Cooking in the backcountry should be simple, requiring minimal fuel, cookware, and effort.
In this guide, we’ll explore a variety of easy, nutritious, and delicious backpacking recipes designed to keep you fueled on the trail. Whether you’re a weekend warrior or tackling a thru-hike, these meals will help you stay strong and satisfied without adding unnecessary bulk to your pack.
Essential Considerations for Backpacking Meals
Planning meals for a backpacking trip requires more than just picking your favorite foods. You need to balance weight, nutrition, and ease of preparation while ensuring your meals stay fresh throughout your journey. Below are the key factors to consider when selecting and preparing food for the trail.
Lightweight and Portable Ingredients
Since every ounce in your pack adds to the load you’ll carry, choosing lightweight foods is crucial. Here’s how to optimize your food selection:
- Dehydrated & Freeze-Dried Foods – These foods remove moisture, significantly reducing weight while retaining nutrients. Examples include freeze-dried fruits, dehydrated veggies, and powdered soup mixes.
- Compact & Calorie-Dense Options – Opt for foods that take up minimal space but provide maximum energy, like nut butters, energy bars, and instant oats.
- Repurposed Packaging – Remove excess packaging and store food in resealable bags or vacuum-sealed packs to save space and reduce waste.
High-Energy and Nutrient-Dense Foods
Backpacking burns a lot of calories, and your meals should replenish lost energy while keeping you full and fueled. Key nutritional factors include:
- Complex Carbohydrates – Whole grains, dried fruits, and pasta provide sustained energy.
- Proteins for Muscle Recovery – Jerky, tuna packets, protein bars, and powdered eggs help repair muscles after long hikes.
- Healthy Fats – Nuts, seeds, olive oil packets, and cheese are calorie-dense and provide long-lasting energy.
- Electrolyte Balance – Salted nuts, sports drink powders, and dehydrated soups help replenish sodium and potassium lost through sweating.
Ease of Preparation
Cooking in the backcountry should be simple and require minimal fuel and equipment. Consider:
- Just-Add-Water Meals – Instant soups, oatmeal, couscous, and ramen require only hot water and a short wait time.
- One-Pot Meals – Minimize cleanup by choosing meals like instant rice with dehydrated vegetables and seasoning.
- No-Cook Options – Trail mix, nut butter wraps, energy bars, and dried meats require no cooking, saving both time and fuel.
Long Shelf Life and Preservation Tips
Since fresh ingredients spoil quickly, opt for foods with a long shelf life. Here’s how to keep your food safe and edible:
- Use Dehydrated or Freeze-Dried Ingredients – These last much longer than fresh foods and retain most of their nutrients.
- Store Fatty Foods Carefully – Nuts and cheese can go rancid in hot conditions, so store them in airtight containers.
- Avoid Perishable Dairy & Meats – Choose shelf-stable alternatives like powdered milk, hard cheeses, and vacuum-sealed meats.
- Protect Against Moisture & Pests – Store food in waterproof, resealable bags to prevent spoilage and keep critters away.
By focusing on these essential considerations, you can create a meal plan that is lightweight, nutritious, and easy to prepare—helping you stay energized and enjoy your adventure without unnecessary hassle.
Breakfast Recipes for Backpacking
Starting your day with a nutritious and energy-packed breakfast is crucial when backpacking. A well-balanced morning meal helps sustain energy levels, keeps you feeling full, and prepares you for the physical demands of the trail. Below are three easy, lightweight, and delicious breakfast options that require minimal preparation and provide maximum fuel for your adventure.
Instant Oatmeal with Nuts and Dried Fruit
A classic backpacking breakfast, instant oatmeal is lightweight, easy to prepare, and packed with carbohydrates for sustained energy.
Ingredients:
- ½ cup instant oats
- 1 tbsp powdered milk (optional for creaminess)
- 1 tbsp chia seeds or flaxseeds (for extra fiber and protein)
- 2 tbsp dried fruit (raisins, cranberries, or chopped apricots)
- 1 tbsp nuts (almonds, walnuts, or pecans)
- 1 tsp cinnamon or a pinch of salt (optional)
- 1 tbsp honey or maple syrup (optional, packed separately)
Instructions:
- Pre-mix dry ingredients in a resealable bag before your trip.
- At camp, add the mixture to your cup or pot.
- Pour in about ½ cup boiling water (adjust to preferred consistency).
- Stir, cover, and let sit for 2-3 minutes.
- Add honey or maple syrup if desired, and enjoy!
Why It’s Great: Lightweight, high-energy, customizable, and requires only hot water.
Powdered Egg Scramble with Dehydrated Veggies
For those who prefer a savory and protein-rich breakfast, powdered eggs with dehydrated vegetables make for a great backcountry meal.
Ingredients:
- ¼ cup powdered eggs
- ¼ cup dehydrated vegetables (bell peppers, onions, mushrooms, or spinach)
- 1 tbsp powdered cheese (optional)
- ½ tsp salt and pepper (pre-mixed in a small bag)
- 1 tbsp olive oil or ghee (for cooking)
- ½ cup water
Instructions:
- Rehydrate the vegetables by soaking them in a small amount of warm water for 5 minutes.
- In a separate container, mix powdered eggs with ½ cup water until smooth.
- Heat a small pan with olive oil or ghee.
- Pour in the egg mixture and stir constantly.
- Add rehydrated vegetables and cook until eggs are firm.
- Sprinkle powdered cheese, if using, and enjoy.
Why It’s Great: High in protein, easy to cook, and provides long-lasting energy.
Homemade Granola and Milk Powder Mix
A no-cook, nutrient-dense breakfast that provides a great mix of carbs, protein, and healthy fats.
Ingredients:
- ½ cup granola (store-bought or homemade)
- 2 tbsp milk powder (whole or skim)
- 1 tbsp seeds (sunflower, chia, or pumpkin)
- 2 tbsp dried fruit (blueberries, dates, or banana chips)
- 1 tbsp nut butter (packed separately, optional)
- ½ cup water
Instructions:
- Mix all dry ingredients in a resealable bag before your trip.
- When ready to eat, pour the mixture into a bowl or mug.
- Add ½ cup cold water and stir well.
- Let sit for a minute, then enjoy.
- Add nut butter for extra protein and flavor.
Why It’s Great: No cooking required, lightweight, and packed with nutrients.
Final Thoughts
These backpacking breakfasts are designed to be simple, high-energy, and easy to prepare with minimal fuel and equipment. Whether you prefer a warm meal like oatmeal and eggs or a quick no-cook option like granola, these recipes will help fuel your adventures without weighing you down.
Easy Lunch and No-Cook Meals for the Trail
Simple, lightweight lunch options for on-the-go eating.
Peanut Butter and Tortilla Wraps
A high-protein, non-perishable meal.
Ingredients:
- 1 whole wheat tortilla
- 2 tbsp peanut butter (or almond/sunflower butter)
- 1 tbsp honey or jam (optional)
- 1 tbsp chia seeds or crushed nuts (optional for extra nutrition)
Instructions:
- Spread peanut butter evenly over the tortilla.
- Add honey, jam, or extra toppings if desired.
- Roll up tightly and enjoy!
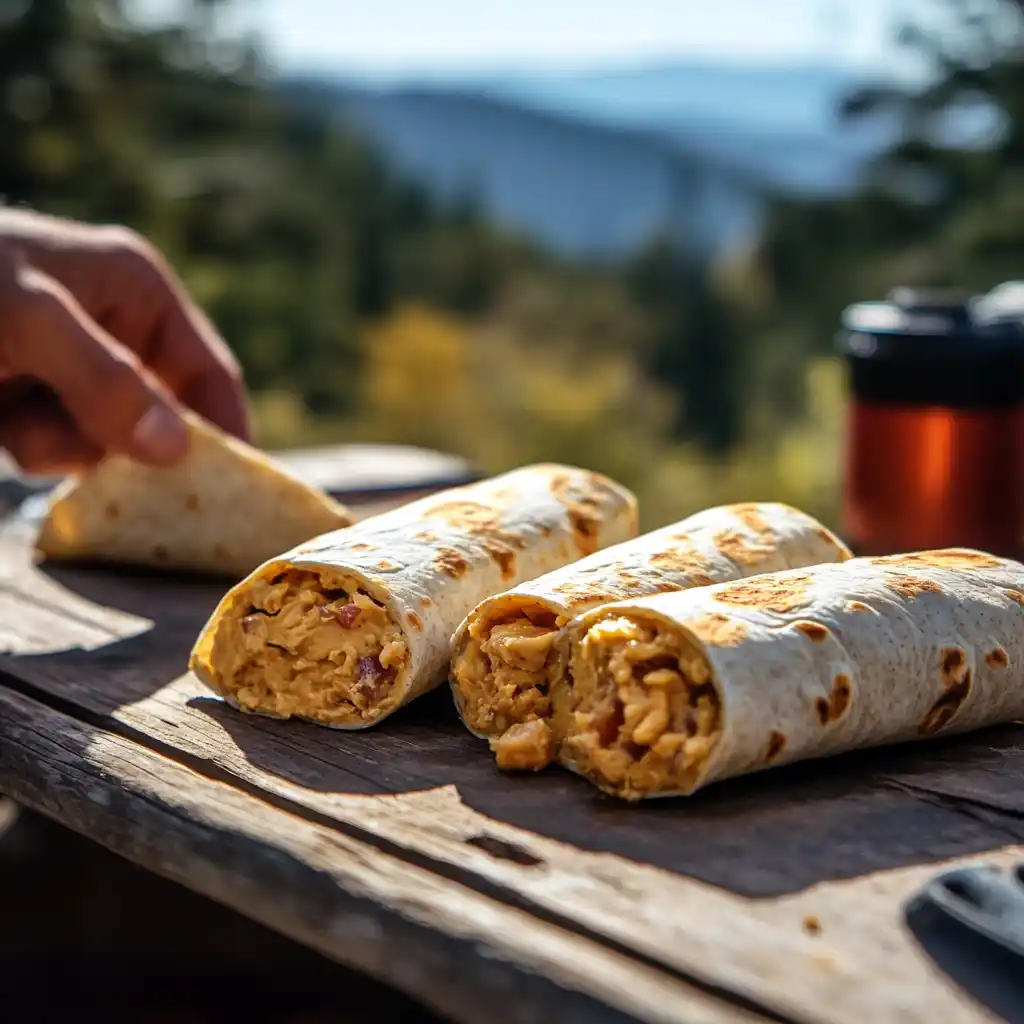
Why It’s Great: High in protein and healthy fats, non-perishable, and requires no cooking.
Dehydrated Hummus with Crackers
A tasty, lightweight, and nutritious lunch.
Ingredients:
- ¼ cup dehydrated hummus powder
- 2 tbsp olive oil (optional for extra calories)
- ¼ cup water
- Whole grain crackers or pita chips
Instructions:
- In a small container or ziplock bag, mix hummus powder with water until smooth.
- Stir in olive oil if using.
- Dip crackers or pita chips and enjoy.
Why It’s Great: Lightweight, packed with plant-based protein, and requires only water to prepare.
Instant Noodles with Freeze-Dried Vegetables
A quick, warm meal requiring only hot water.
Ingredients:
- 1 pack instant noodles (preferably whole grain or rice noodles)
- ¼ cup freeze-dried vegetables (peas, carrots, bell peppers)
- 1 tbsp powdered broth or seasoning mix
- 1 tbsp dehydrated protein (TVP, freeze-dried chicken, or soy crumbles) (optional)
Instructions:
- Add noodles, freeze-dried vegetables, and seasoning to a heatproof container.
- Pour in boiling water until noodles are covered.
- Cover and let sit for 5-7 minutes.
- Stir and enjoy.
Why It’s Great: Lightweight, warming, and easy to prepare with just hot water.
Dinner Recipes for Backpacking
Warm, satisfying, and easy-to-cook dinner ideas.
One-Pot Couscous with Vegetables and Spices
A lightweight, flavorful, and quick meal.
Ingredients:
- ½ cup instant couscous
- ¼ cup dehydrated vegetables
- ½ tsp salt and pepper
- ½ tsp garlic powder, cumin, or curry powder (optional)
- 1 tbsp olive oil or ghee
- ¾ cup boiling water
Instructions:
- In a heatproof container, combine couscous, dehydrated vegetables, and seasonings.
- Pour in boiling water and cover.
- Let sit for 5 minutes, then fluff with a fork.
- Stir in olive oil or ghee and enjoy.
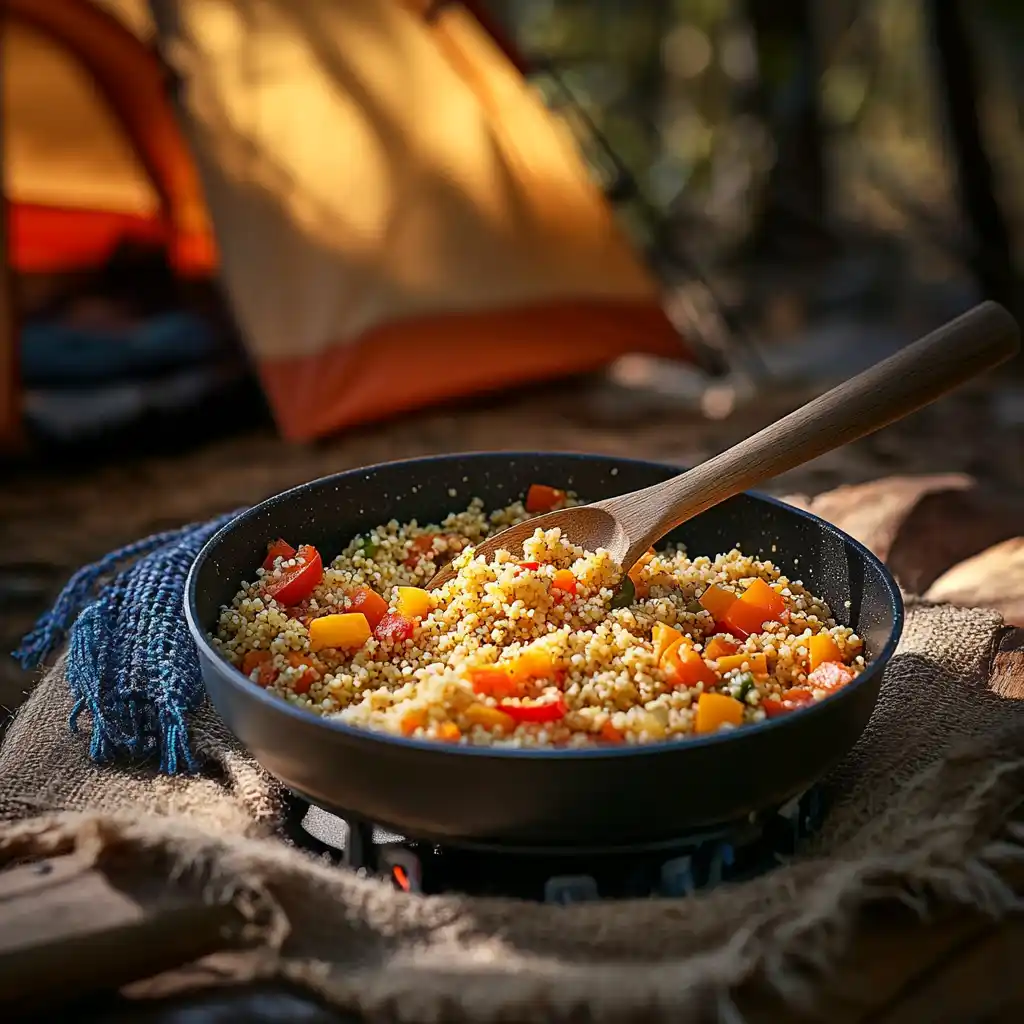
Why It’s Great: Requires minimal fuel and provides a balanced mix of carbs and nutrients.
Instant Rice with Tuna and Spices
A protein-packed, easy-to-prepare dish.
Ingredients:
- ½ cup instant rice
- 1 single-serving pouch of tuna (or chicken)
- ¼ tsp salt and pepper
- ½ tsp garlic powder or paprika
- ¾ cup boiling water
Instructions:
- Add instant rice and spices to a heatproof container.
- Pour in boiling water, stir, and cover.
- Let sit for 5 minutes until rice is soft.
- Mix in tuna and enjoy.
Why It’s Great: High in protein, easy to prepare, and filling.
Dehydrated Chili with Beans and TVP
A hearty, vegetarian-friendly meal.
Ingredients:
- ½ cup dehydrated chili mix (beans, TVP, tomatoes, spices)
- 1 cup boiling water
- 1 tbsp olive oil (optional)
Instructions:
- Add dehydrated chili mix to a pot.
- Pour in boiling water and stir well.
- Simmer for 10-15 minutes until rehydrated.
- Stir in olive oil if desired and serve hot.
Why It’s Great: Filling, rich in protein, and easy to rehydrate on the trail.
Snack Ideas for Sustained Energy
High-calorie, nutritious snacks to keep energy levels up.
Trail Mix with Nuts, Seeds, and Dried Fruits
A homemade energy-boosting snack.
Ingredients:
- ½ cup mixed nuts (almonds, cashews, walnuts)
- ¼ cup dried fruit (raisins, cranberries, banana chips)
- 2 tbsp seeds (pumpkin, sunflower, chia)
- ¼ cup dark chocolate chips or yogurt-covered raisins
Instructions:
- Mix all ingredients in a resealable bag.
- Eat as needed for an energy boost.
Why It’s Great: Customizable, calorie-dense, and requires no preparation.
Homemade Energy Bars with Oats and Honey
Lightweight, nutritious, and delicious energy bars.
Ingredients:
- 1 cup rolled oats
- ¼ cup honey or maple syrup
- ¼ cup peanut butter
- ¼ cup chopped nuts or seeds
- ¼ cup dried fruit
- ½ tsp cinnamon (optional)
Instructions:
- Mix all ingredients in a bowl until well combined.
- Press into a parchment-lined pan and refrigerate for at least an hour.
- Cut into bars and store in a resealable bag.
Why It’s Great: High in healthy fats and carbs, easy to carry, and homemade.
Beef Jerky and Hard Cheese
Protein-rich, non-perishable snack options.
Ingredients:
- 2 oz beef jerky
- 2 oz hard cheese (cheddar, gouda, parmesan)
Why It’s Great: Long shelf life, high in protein, and satisfying.
By incorporating these easy and nutritious meals into your backpacking trip, you’ll stay energized, minimize weight, and maximize your enjoyment on the trail.
Cooking Gear and Essentials for Backpackers
Having the right cooking gear can make meal preparation on the trail easier, more efficient, and enjoyable. When selecting cooking equipment, it’s important to consider weight, packability, and fuel efficiency.
Lightweight Stoves and Fuel Options
There are several stove types available for backpackers, each with pros and cons.
1. Canister Stoves
Pros: Lightweight, easy to use, quick boiling times.
Cons: Fuel canisters can be expensive and harder to find in remote areas.
Best For: Solo or small-group backpackers who want a reliable, no-fuss cooking experience.
3. Wood-Burning Stoves
Pros: No need to carry fuel, eco-friendly.
Cons: Requires dry wood, can be slow, not allowed in some areas.
Best For: Hikers in forested areas with access to dry twigs and small sticks.
4. Solid Fuel Stoves
Pros: Compact, reliable, easy to use.
Cons: Slower heating, fuel can be hard to find.
Best For: Emergency backup or ultralight hikers.
Compact Cookware and Utensils
Choosing the right cookware ensures you can cook efficiently without adding unnecessary weight.
Recommended Gear:
- Lightweight pot (Titanium or Aluminum) – Durable and efficient for boiling water.
- Collapsible bowl or mug – Saves space and is versatile.
- Spork or long-handled spoon – Lightweight and multipurpose.
- Small knife or multi-tool – Useful for cutting food or preparing meals.
- Mini cutting board (optional) – Helps with food prep for longer trips.
Pro Tip: Consider nesting your cookware (storing a stove or small items inside your pot) to save space.
Best Food Storage and Packaging Tips
Proper food storage helps reduce waste, saves space, and keeps food fresh.
Food Packing Tips:
- Use resealable bags – Pre-portion ingredients to reduce bulk.
- Vacuum-seal dehydrated meals – Saves space and preserves food.
- Opt for reusable silicone bags – Eco-friendly and durable.
- Store fuel separately – Avoid contamination.
- Use a bear-proof container or hang food – Protects against wildlife.
Pro Tip: Label food bags with cooking instructions and required water amounts to save time on the trail.
Water and Hydration Tips for Backpacking Cooking
Staying hydrated and having enough water for cooking is essential on the trail. Understanding how much to carry, where to find water, and how to purify it will help ensure a safe and enjoyable trip.
How Much Water to Carry and Where to Find It
Water needs depend on temperature, activity level, and available water sources.
How Much to Carry:
- General Rule: 2-4 liters per day per person.
- For Cooking: Plan ½-1 liter per meal (depending on the recipe).
- In Dry Areas: Carry extra or plan meals that require less water.
Where to Find Water:
- Streams and Rivers – Reliable but may require filtration.
- Lakes and Ponds – Generally safe with proper purification.
- Rainwater or Snowmelt – Can be collected but must be filtered.
Pro Tip: Check maps or local resources to find reliable water sources before your trip.
Best Water Filtration and Purification Methods
Ensuring your water is clean and safe to drink is crucial. Here are the best options:
1. Water Filters (Pump or Squeeze)
Pros: Removes bacteria, protozoa, and sediment.
Cons: Does not remove viruses.
Best For: Areas with fresh, flowing water sources.
2. Chemical Purification (Tablets or Drops)
Pros: Lightweight, kills viruses, easy to use.
Cons: Can leave a chemical taste, takes time to work.
Best For: Emergency backup or when traveling in areas with virus risk.
3. UV Purifiers (SteriPen, etc.)
Pros: Kills bacteria, viruses, and protozoa quickly.
Cons: Requires batteries and clear water.
Best For: Fast purification with minimal effort.
Pro Tip: Pre-filter water with a cloth or coffee filter to remove debris before purification.
Rehydrating Dried Meals Properly
Rehydration is key to making freeze-dried and dehydrated meals taste their best.
Tips for Proper Rehydration:
- Use the right water-to-food ratio – Too much water makes meals soupy, too little leaves them crunchy.
- Let food sit long enough – Most meals need 10-15 minutes to fully absorb water.
- Use warm water when possible – Speeds up rehydration and improves texture.
- Stir well and cover – Helps distribute moisture evenly.
Pro Tip: Soak foods like beans, rice, or lentils while hiking to reduce cooking time in camp.
By having the right cooking gear, water strategies, and food storage techniques, you can enjoy delicious, hassle-free meals on the trail while staying hydrated and prepared for any situation.
Conclusion
Backpacking meals should be lightweight, nutritious, and easy to prepare, allowing hikers to enjoy delicious food without carrying excessive weight. By selecting high-energy ingredients and using efficient cooking methods, backpackers can stay fueled for long hikes while keeping meal prep simple. Whether you’re enjoying a quick peanut butter and tortilla wrap on the go or warming up with a one-pot couscous dinner, these meals ensure you stay energized without sacrificing taste.
For those looking to diversify their trail menu, consider exploring pumpkin risotto with beans for a gourmet yet portable backpacking meal. If you’re in need of high-calorie snacks, a butter toffee pretzel mix could be a perfect addition to your trail mix. And for a protein-packed meal after a long day of hiking, a supreme pizza-inspired dish might just hit the spot.
By carefully planning meals and selecting long-lasting, easy-to-prepare foods, backpackers can enhance their outdoor experience while ensuring they meet their energy needs. Happy trails and happy eating!